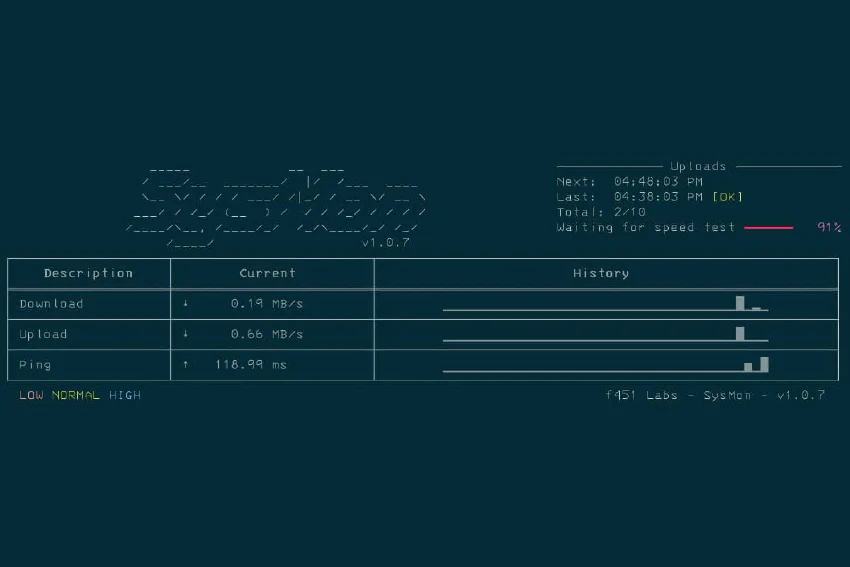
f451 Labs RPI SysMon Application
This application is running on my f451 Labs piF451 device.
Overview
This application is designed for my f451 Labs piF451 and piRED devices, which are both equipped with Raspberry Pi Sense HAT add-ons. The main objective is continuously running internet speed tests using the speedtest-cli library and then upload data to the Adafruit IO service.
Install
This application is not available on PyPi. However, you can still use pip to install the module directly from GitHub (see below).
Dependencies
This module is dependent on the following libraries:
- speedtest-cli - only used for internet speed tests
- sense-hat — only install if you have a physical Sense HAT device
- adafruit-io — only install if you have an account with the Adafruit IO service
NOTE: You can run this app in demo mode on (almost) any device, even without the Sense HAT. It will then create random numbers and can send output to the logger when log level is DEBUG or when --debug flag is used.
Installing from GitHub using pip
You can use pip install to install this module directly from GitHub as follows:
$ pip install 'f451-piF451 @ git+https://github.com/mlanser/f451-piF451.git'
What’s with the name ‘f451-piF451’
The original idea behind this repo was to hold all applications running on a particular Raspberry Pi device — piF451 — in my network. This device has a specific hardware configuration and general “purpose” (i.e. to collect and process internet speed data).
So, if/when I add more applications to this device, they’ll also be added to this repo and show up as ‘scripts’ entry points in the pyprojects.toml file.
How to use
Running the application
The sysmon application is designed to run unsupervised, and it will collect and upload data until it is interrupted by some external event (e.g. keyboard interrupt, process kill command, etc.)
To launch this application from a terminal:
$ nohup python -u sysmon.py > sysmon.out &
This command launches the sysmon application in the background. The application will keep running even after the terminal window is closed. Any output will be redirected to the sysmon.out file.
It’s also possible to install this application via pip from GitHub, and one can then launch the application as follows:
$ nohup sysmon > sysmon.out &
Interacting with the application
The sysmon application can read settings from both a settings.toml file and from CLI arguments:
# Use CLI arg '-h' to see available options
$ sysmon -h

# Stop after 10 uploads
$ sysmon --uploads 10

# Show 'progress bar' regardless of setting in 'toml' file
$ sysmon --progress

# Show specific display mode (e.g. 'download' speed) regardless
# of setting in 'toml' file
$ sysmon --dmode download
The format of the settings.toml file is straightforward, and this is also where you should store Adafruit IO credentials. The settings.toml file only supports numbers and strings. But you define most aspects of the applications here.
For example, if you change the PROGRESS setting to 1, then the Sense HAT LED will display a progress bar indicating when the next (simulated) upload will happen.
A ‘sleep mode’ also turns off the display automatically after a certain amount of time, and you can also turn the LED display on/off by pushing/tapping the joystick button (down).
# File: settings.toml
...
PROGRESS = 1    # [0|1] - 1 = show upload progress bar on LED
SLEEP = 600     # Delay in seconds until screen is blanked
...
Please refer to the section “Custom application settings in SETTINGS.TOML” below for more information on available options in the settings.toml file.
The sysmon application can display live data in the terminal and on the Sense HAT LED. If you do not want to see any output in the terminal (e.g. if you’re going to run the application in the background), you can start the application with the --noCLI flag. Similarly, the --noLED flag prevents any output to the Sense HAT LED.
This application offers 4 different display modes for the Sense HAT LED:
- download — show realtime graph of current download speed
- upload — show realtime graph of current upload speed
- ping — show realtime graph of ping response time
- sparkles — show random pixels light up — looks great at night and lets you know the app is running 😉
You can switch between display modes by pushing the Sense HAT joystick left or right and rotating the display by pushing the joystick up or down. And again, you can turn the LED display on/off by tapping (pushing straight down) the joystick in the middle.
Finally, you can exit the application using the ctrl-c command. If you use the --uploads N command line argument, the application will stop after N (simulated) uploads.
NOTE: It takes a bit of time to run the actual speed test, and you’ll probably only want to run this every few minutes. This obviously slows down the ‘realtime’ display. However, this application is really designed to run in the background, and you’ll most likely only want to see “realtime” graph data output to the terminal and/or Sense HAT LED when you’re configuring and/or testing the application.
How to test
This test suite is still very much WIP.
The tests are written for pytest, and we use markers to separate out tests that require the actual Sense HAT hardware. Some tests do not rely on the hardware to be present. However, those tests rely on the pytest-mock module to be present.
# Run all tests (except marked 'skip')
$ pytest

# Run tests with 'hardware' marker
$ pytest -m "hardware"

# Run tests without 'hardware' marker
$ pytest -m "not hardware"
Custom application settings in SETTINGS.TOML
The ‘settings.toml’ file holds various custom application settings and secrets (e.g. Adafruit IO keys, etc.), and this file should NOT be included in ‘git’ commits.
It is recommended to copy the ‘settings.example’ to ‘settings.toml’ and then customize the values in ‘settings.toml’ as needed for the specific device that the application is running on.
Adafruit IO settings
-
AIO_USERNAME: ‘string’ - Adafruit IO username
-
AIO_KEY: ‘string’ - Adafruit IO key
-
AIO_UPLOAD: ‘string’ - yes | force | no
- “yes” - upload if feed available
- “force” - exit if feed invalid
- “no” - do not upload data
-
FEED_DWNLD: ‘string’ - Adafruit IO feed key for ‘download’ feed
-
FEED_UPLD: ‘string’ - Adafruit IO feed key for ‘upload’ feed
-
FEED_PING: ‘string’ - Adafruit IO feed key for ‘ping’ feed
Misc. Application Defaults
-
ROTATION: ‘int’ - 0 | 90 | 180 | 270 degrees to turn 8x8 LED display
- 90 | 270 - top of LED will point toward/away RPI HDMI
- 0 | 180 - top of LED will point away/toward RPI USB
-
DISPLAY: ‘str’
- ’name_of_display_mode’ - name of display mode with single data point (e.g. download speed, etc.) and scrolling bar graph
- ‘sparkles’ - default display is in ‘sparkle’ mode where data is collected and uploaded but not displayed
-
DELAY: ‘int’ - delay in seconds between uploads to Adafruit IO.
- Smaller number means more freq uploads and higher data rate
-
WAIT: ‘int’ - delay in seconds between sensor reads
-
THROTTLE: ‘int’ - additional delay in seconds to be applied on Adafruit IO ‘ThrottlingError’
-
PROGRESS: ‘string’ - on | off
- “on” - show ‘wait for upload’ progress bar on LED
- “off” - do not show progress bar
-
SLEEP: ‘int’ - delay in seconds until LED is blanked for “screen saver” mode
-
LOGLVL: ‘string’ - debug | info | error
- Logging levels (see: Python docs for more info)
-
LOGFILE: ‘string’ - path and file name for log file


