f451 Labs piRed - Collect Data With Sense HAT
Overview
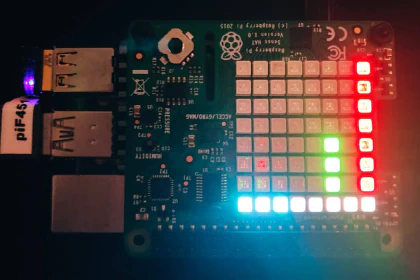
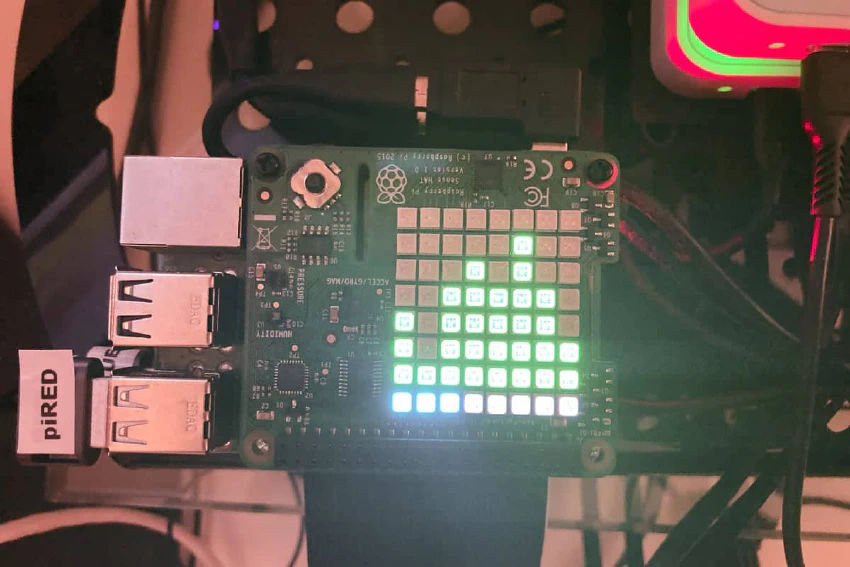
The main objective of this project is to run one or more monitoring applications and display some form of progress on an onboard display. This Raspberry Pi has a Raspberry Pi Sense HAT with an 8x8 LED display, several onboard sensors, and a joystick.
I also have another Rasberry Pi equipped with a Sense HAT. But on that device we only use the onboard LED display to show real-time internet speed test data. And yes, I sometimes purchase more than one unit of this or that hardware because I have these grand plans of building crazy projects … but then I forget about the project and build something else instead.
I could blame this forgetfulness on old age. But instead, I will blame it on my day job interfering with my much-needed hobby time … there I said it! 🤓
Anyway, this particular Raspberry Pi device currently runs one application — sensemon — and the main task is to collect indoor environment data at regular intervals. However, since I already have another device with more accurate sensors, the data from this device is not uploaded to the cloud. It does get displayed on the onboard 8x8 LED display, though.
Finally, the Sense HAT joystick can switch display modes to show different environment data, and there is also a “Sparkle Mode,” which is very pretty at night. It also lets me know that the app is still running 😊
Device specifications & configuration
General specifications
I decided to use an older Raspberry Pi as there’s not much needed to run the monitoring application. The device is headless and we’re therefore running the OS without the GUI (desktop).
- Device: RP3 - Model B Rev 1.2 / 1GB - Bullseye (Debian 11) / 32bit
- Network: wlan0 (wifi)
- Display & keyboard: none
- Other hardware: Raspberry Pi Sense HAT
- Remote access: SSH
Main tools & applications
Most software on this device focuses on running various Python applications. But I’ve also added a few tools to make life easier when I need to debug stuff after things go sideways.
- NetworkManager — my default tool for managing network settings on my RPIs
- UFW (firewall) — my default tool for managing firewall settings on my RPIs
- htop — my default process viewer/manager on my RPIs
- Misc. tools — e.g. PIPX, git, etc.
As a side note, most of my devices are configured in similar ways with (mostly) the same tools. And while some devices have GUIs, most do not, and I usually access all devices from my laptop via SSH.
Custom applications & scripts
This Raspberry Pi is configured the following applications and scripts:
- sensemon — this application collects indoor environment data from the Sense HAT sensors. However, the application is not configured to upload the data anywhere as I already have another device with even better sensors doing just that. Still, the data from the
sensemonapplication is displayed in real-time on the onboard 8x8 LED display.
The sensemon application is installed as part of the overall f451-piRED package. You can run it directly from the terminal when the package is installed with the pip or pipx commands (see below for more info).
Common workflows
Given its role as a single-purpose monitoring device, there is essentially only one workflow (aside from maintaining the device itself): install and run monitoring applications.
My CLI applications can be installed via the pip command, so the workflow is straightforward. Although, I have switched to using the pipx command to ensure that whatever application I install does not “pollute” the Python environment on this Raspberry Pi device.
Now, one additional wrinkle is that my applications and packages are not hosted on PyPi. Instead, I install them directly from my GitHub repo as follows:
$ pipx install git+ssh://<username>@github.com/<path-to-my-app.git>
This method allows me to install Python applications quickly, and I can run each CLI application by simply typing my_app_name in the terminal.
The pipx install command is very flexible, and several switches are available. For example, the --python switch allows us to define which version of Python (v3.6+) to use for the installation, which can be very useful when trying different scenarios.
It’s also possible to use the pipx upgrade to upgrade one’s application. However, that assumes that one first has bumped the version number in GitHub. Instead, I rerun the pip install command with the --force switch, which doesn’t care whether the version has been bumped.
Finally, I do not install my applications in “editable” mode (using the -e switch) on this Raspberry Pi as I do not edit code directly on this device.
Summary
Getting this Raspberry Pi up and running as a single-purpose device running a few CLI applications was trivial. However, as with some of my other single-purpose devices, the goal is (ideally) to never stop running. And yes, that’s an impossible goal. Nevertheless, that’s what we’re working towards, which means one must think through how to automate and streamline maintenance and support routines.
For example, we’ll need to update the OS and various support libraries over time. And, of course, every once in a while, we’ll want to update the actual monitoring applications. Most maintenance tasks can be done without restarting the device. But there are occasions when the updates require a restart.
Finally, there are external events that may affect this device. For example, there’s the occasional internet or power outage. In short, the devices go down when the proverbial (and very real) lights go out.
All this means that it’s worth spending a bit of time creating easy (re-)start processes, upgrade scripts, and so on 😊