f451 Labs piEnviro - Collect Data With Enviro+
Overview
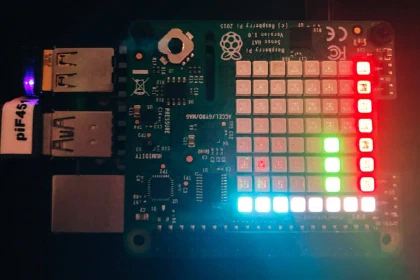
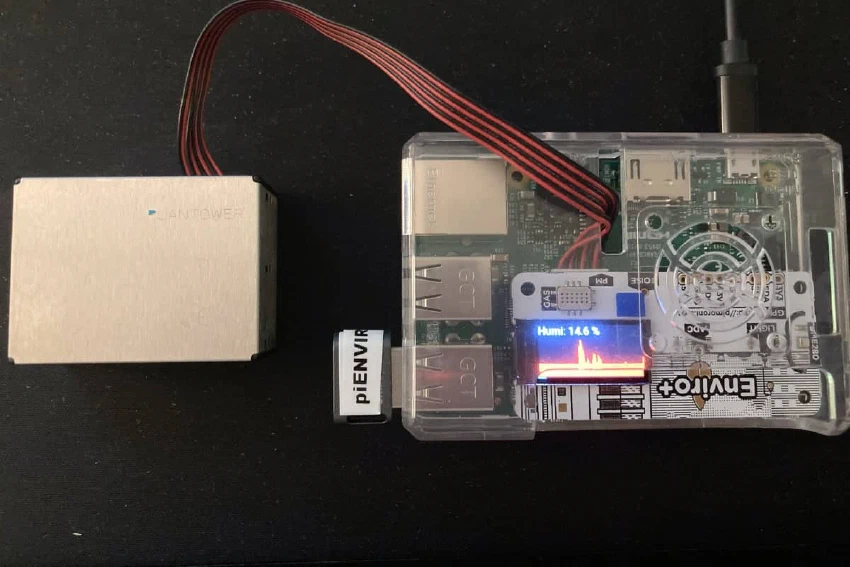
The main objective of this project is to collect environment data, upload it to the cloud, and display some form of progress on an onboard display. This Raspberry Pi has a Pimoroni Enviro+ HAT with an 0.96" LCD.
This particular Raspberry Pi device currently runs one application — enviromon — and the main task is to collect miscellaneous indoor environment data, upload to various Adafruit IO feeds, and, of course, also display in realtime on the onboard LCD.
We’re using the Enviro+ light sensor to allow the user to switch display modes to show different environment data as graphs or text. To switch mode, one simply covers the light sensor for a bit with a hand or piece of paper. And yes, there is also a “Sparkle Mode” and “Sleep Mode” where the display is blank 😊
Device specifications & configuration
General specifications
I decided to use an older Raspberry Pi as there’s not much needed to run the monitoring application. The device is headless and we’re therefore running the OS without the GUI (desktop).
- Device: RP3 - Model B Rev 1.2 / 1GB - Bullseye (Debian 11) / 32bit
- Network: wlan0 (wifi)
- Display & keyboard: none
- Other hardware: Pimoroni Enviro+ HAT
- Remote access: SSH
Main tools & applications
This device is configured to run a single Python application. But I’ve still added a few tools to make life easier when I need to debug stuff after things go sideways.
- NetworkManager — my default tool for managing network settings on my RPIs
- UFW (firewall) — my default tool for managing firewall settings on my RPIs
- htop — my default process viewer/manager on my RPIs
- Misc. tools — e.g. PIPX, git, etc.
As a side note, most of my devices are configured in similar ways with (mostly) the same tools. And while some devices have GUIs, most do not, and I usually access all devices from my laptop via SSH.
Common workflows
Given its role as a single-purpose monitoring device, there is essentially only one workflow (aside from maintaining the device itself): install and run monitoring applications.
My CLI applications can be installed via the pip command, so the workflow is straightforward. Although, I have switched to using the pipx command to ensure that whatever application I install does not “pollute” the Python environment on this Raspberry Pi device.
Now, one additional wrinkle is that my applications and packages are not hosted on PyPi. Instead, I install them directly from my GitHub repo as follows:
$ pipx install git+ssh://<username>@github.com/<path-to-my-app.git>
This method allows me to install Python applications quickly, and I can run each CLI application by simply typing my_app_name in the terminal.
The pipx install command is very flexible, and several switches are available. For example, the --python switch allows us to define which version of Python (v3.6+) to use for the installation, which can be very useful when trying different scenarios.
It’s also possible to use the pipx upgrade to upgrade one’s application. However, that assumes that one first has bumped the version number in GitHub. Instead, I rerun the pip install command with the --force switch, which doesn’t care whether the version has been bumped.
Finally, I do not install my applications in “editable” mode (using the -e switch) on this Raspberry Pi as I do not edit code directly on this device.
Summary
Getting this Raspberry Pi up and running as a single-purpose device running a few CLI applications was trivial. However, it’s worth noting that the goal is for this device to essentially never stop running. That means one needs to think through how to automate and streamline maintenance and support routines.
For example, from time to time, we’ll need to update the OS, the various support libraries, etc. And, of course, every once in a while, we’ll want to update the actual monitoring applications. Most maintenance tasks can be done without restarting the device. But there are occasions when the updates require a restart.
Finally, there are external events that may affect this device. For example, we had a day-long internet outage not too long ago, and when everything came back online, we had to restart the router. Then, there have been power outages in the neighborhood. And no, my home network of Raspberry Pis is not hosted in a data center with fail-over power, etc. So when the lights go out, the devices go down.
All this means that it’s worth spending a bit of time creating easy (re-)start processes, upgrade scripts, and so on 😊